
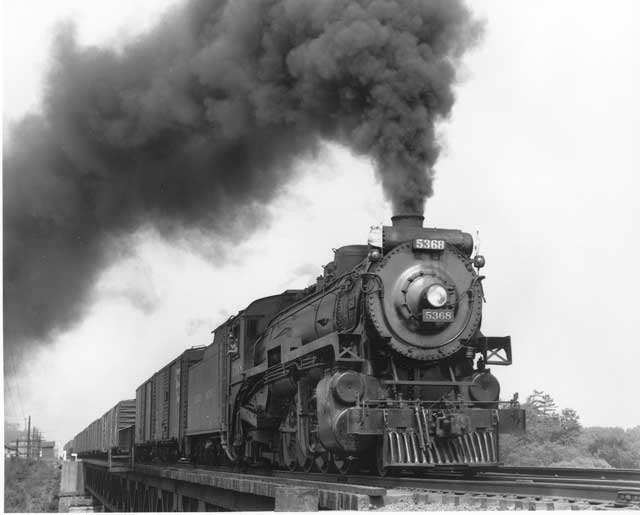
NEXT TO KNOWING HOW TO DRESS WELL, FIRE IS ONE OF THE MOST IMPORTANT BUSH SKILLS THERE ARE, BECAUSE IT IS ONE OF THE FEW MEANS AVAILABLE TO MAKE UP MOST GREAT DEFICIENCIES.
Master Woodsman Mors Kochanski’s excellent quote above sums it up. Next to knowing how to dress well (reducing heat loss), fire is a most critical skill.
Unfortunately, when we need fire the most, it is usually when it’s cold and wet, which obviously makes the task more difficult. So how do we increase the odds of success?
 Using an analogy from a motivational program can explain it best. At 211 degrees you have hot water. At 212 degrees you have boiling water which produces steam. With steam you can power a locomotive. Simply put, one degree can make all the difference.
While the motivational program is an analogy, for us woodsmen (or women) making fire, that one degree can be a reality. Extra effort and all important attention to detail can be that one degree and the difference between warm and happy OR cold and, well…
What follows are a few techniques that may help you find that one degree.
Having The Right Gear!
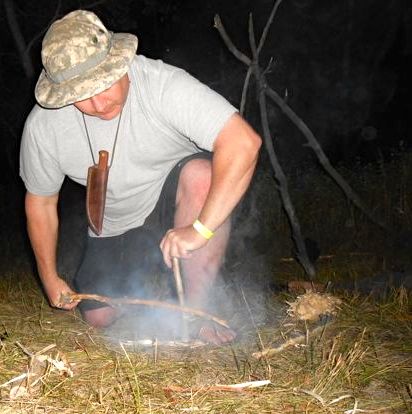
Photo: Brandon Jacobs
It pains me to say this one first as I have an affinity for primitive skills, but having the right equipment for fire is critical. There was a time I was cocky enough to think I could get by “easily” creating fire with just a knife and cordage for the bow drill as I had done it dozens of times. As the years went by and I had done the bow drill hundreds of times, I got better; however, I had also been humbled quite a bit more too. An even more humbling process is making fire from nothing man-made, just stone tools and natural cordage!
That’s why I carry multiple ways to make fire on my person and in my survival kit… Stormproof matches in a waterproof match-safe, fresnel lens, manmade tinder, ferrocerium rod, knife & cordage for the bow drill, lighter, and a Bic lighter.
Training applied in the field. Magnesium scraped into the bill of a hat then put into a tinder bundle for fire. The sun was setting and all we had was our knives and the one mag bar with striking insert to make a fire for cold northern Arizona winter night that went down into the mid-teens.. How about that sweater? I got it for $1 at the thrift store.
As stated earlier, when we need fire most, it is usually when it is also the most difficult time to create. And it could be more than just being cold and wet. Add in a stressful situation and your body may not comply due a nervous system response. Once your heart starts racing past 115 beats per minute and your body chemistry changes with the introduction of adrenaline and other hormones, your fine and complex motor skills will be compromised not to mention your mental capacity (Lundin, 2003). Depending on how you handle the stress, your smaller muscle groups and hand-eye coordination could be compromised even to the point of incapacitating. That means striking a match could be a difficult task to next to impossible. Making and using a bow drill set is simply not realistic with a high pucker-factor.
When your survival is at risk, you need simple solutions that use larger muscle groups with gross motor skills, as they perform best under stress. For fire, scraping a magnesium bar into tinder and lighting with the striking insert is an example of simple gear for a stressful situation (Lundin, 2003). It’s also very important to practice. Those skills you practice will rise to the forefront when really needed.
As the metal match is such an important tool to carry, I suggest you watch this video from Karamat Wilderness Ways with Mors Kochanski. When it comes to this tool as a ignition source, take note that Mors values the scraper at a quarter of the equation and the rod itself at three-quarters. Having a sharp tool as your scraper with a metal match (firesteel) can be that one degree.
http://youtu.be/BhMqg4ugS5Q
Heat + Fuel + Oxygen = Fire (The Book Analogy)
While the metal match is an awesome tool for creating fire, it is simply our heat source for ignition. There are other parts of the fire equation that are equally important, fuel and oxygen.
While instructing a basic outdoor living skills (BOLS™) class, I came up with the analogy detailed below of using a book for teaching the basics of fire. It proves most folks already understand the principles of fire. The scenario goes like this…
If you and I were standing next to a roaring campfire and I handed you a thick book and asked you to burn it, what would you do? You would likely throw it into the fire knowing the existing heat would burn the book. If I handed you the same thick book and one match and asked you to burn the book, what would you do? You would start by ripping out pages, crushing each one into an individual ball of paper, creating a pile, then light one, so that it would ignite the others.
Most folks already understand the importance of a fuel size, shape, and arrangement as it relates to the heat (or ignition) source. They just need to learn how to translate it to the field with varying natural materials and lesser heat sources, especially the metal match.
- Size – simply put, larger fuel has a higher heat capacity than smaller fuel. In other words, the larger the fuel, the more heat needed to raise its temperature for it to burn. In the case of our book, the existing large fire could easily handle the heat capacity. Obviously, our match would not have lit the book as is, we had to modify it. That’s because, the first heat, or the pre-ignition phase, applied to fuel first has to vaporize any moisture (and a few other substances). The more moisture, the more pre-heating required. Pyrolysis comes next; the degradation of chemicals from heat — for some organic materials, that can occur as low as 400*F, but we are going to have to get a lot hotter to achieve flame. Using natural materials, our fuel temperature needs to be somewhere north of 572*F before the needed gases are released to take pre-ignition to flame — that temperature (combustion) varies by material, but is closer to 1,000*F (usually no lower than 800*F). Your average campfire burns north of 2,000*F. (**See below for temperatures and references)
- Shape, or the surface area-to-volume ratio. The more finely divided your fuel, the more surface area. Fuels with high surface area-to-volume ratios have lower heat capacity requiring less pre-heating for ignition. Burning the crushed paper with the radiant flame of our match is feasible with that heat source. If your heat source is a spark from a metal match, or coal from a friction fire, you need to think thread-like to dust for your target area of ignition. The finer the fuel, the quicker it will dry out and ignite; and the more rapidly it will ignite surrounding more coarse fuels, assuming you have them arranged well…
- Arrangement – as an example, paper is thin and has a lot of surface area; as a flat shape and arranged as a book, it would be tough to light without a ton of heat. The relationship of how you manipulate your fuel (size & shape) and have it arranged to the surrounding airspace (oxygen) is critical for the combustion process. There is an ‘optimum’ of how tightly (or loosely) you should pack your tinder. The best way to determine this is if you get your tinder to flame… duh! Realistically, the way to figure that out at the tinder stage is through practice. Fire is an art and a science, you have to practice the art. Pack your tinder too densely, not enough oxygen, no fire. Pack it too loosely or in improper stages of fine to medium to coarse where heat transfer is insufficient (remember pre-ignition), no fire.
So when using natural materials (or not), tinder should be dry and fluffy. An easy way to check for moisture is holding up to your lips. If it feels cool, there is dampness. You can use your body heat to dry it out by placing in your pocket. Size, shape, and arrangement are other considerations we now know can’t be overlooked and could easily make that one degree difference. Potential natural sources include but are not limited to inner-tree bark, bark, grass, leaves, woody stalks, wood fibers, seed heads, flower structures, and shaved (or scraped) wood. Often times these sources are combined.
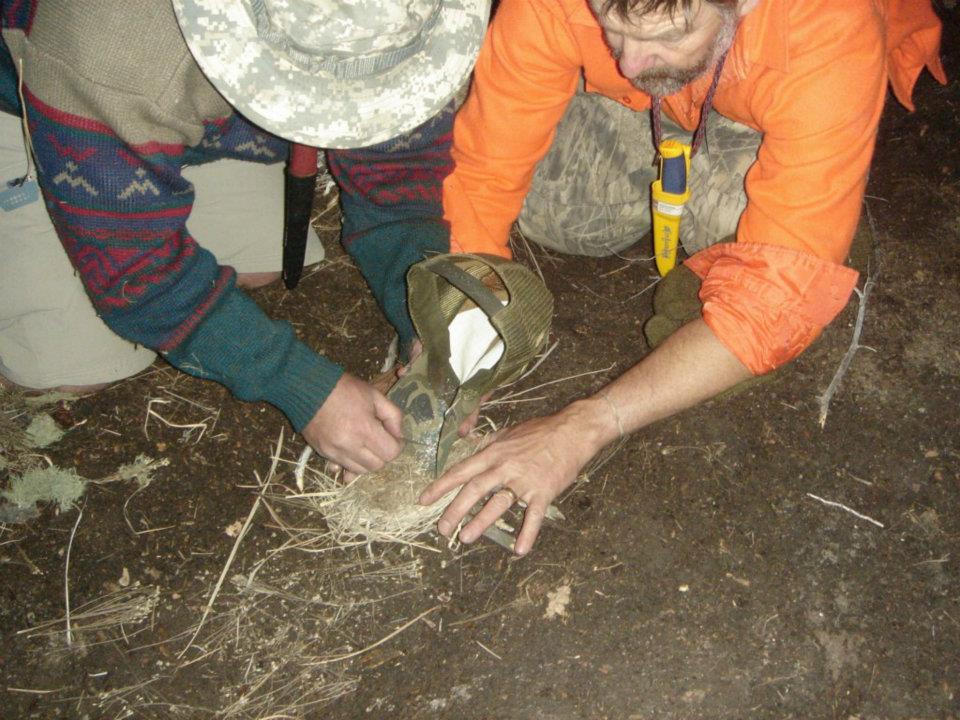
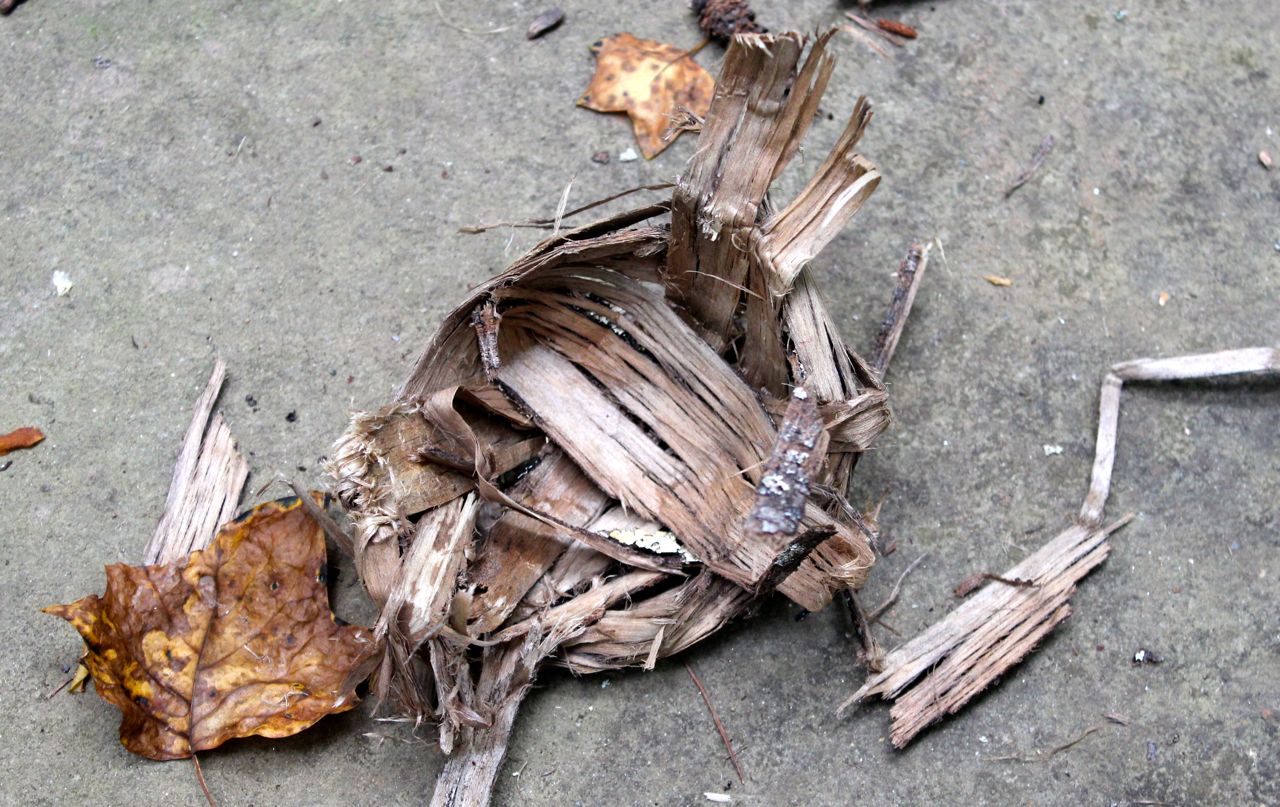
There are several ways to build a tinder bundle, from a bird nest shape made of tree bark to bundling grass and so on. When making the popular bird nest tinder bundle, start with strips or long pieces of fuel as the outer part and work your way in with coarse, medium, and fine modified pieces of fuel. The target area for ignition should be the center and needs to have very small fuel, thread to dust particles if using less than a flame to start. The pictures below are the stages of a tinder bundle made from the inner bark of tulip tree (yellow poplar).

Tulip tree bark pulled from a dead branch or tree. The outer (gray) bark is pulled away from the fibrous inner bark
Inner bark is slightly roughed up and shaped into a bird nest. I usually tie a loose overhand knot to get it started.

Side view of the start of our bird nest tinder bundle.

Next, additional inner bark is pulled apart and rubbed between the hands to create a COARSE tinder and added.
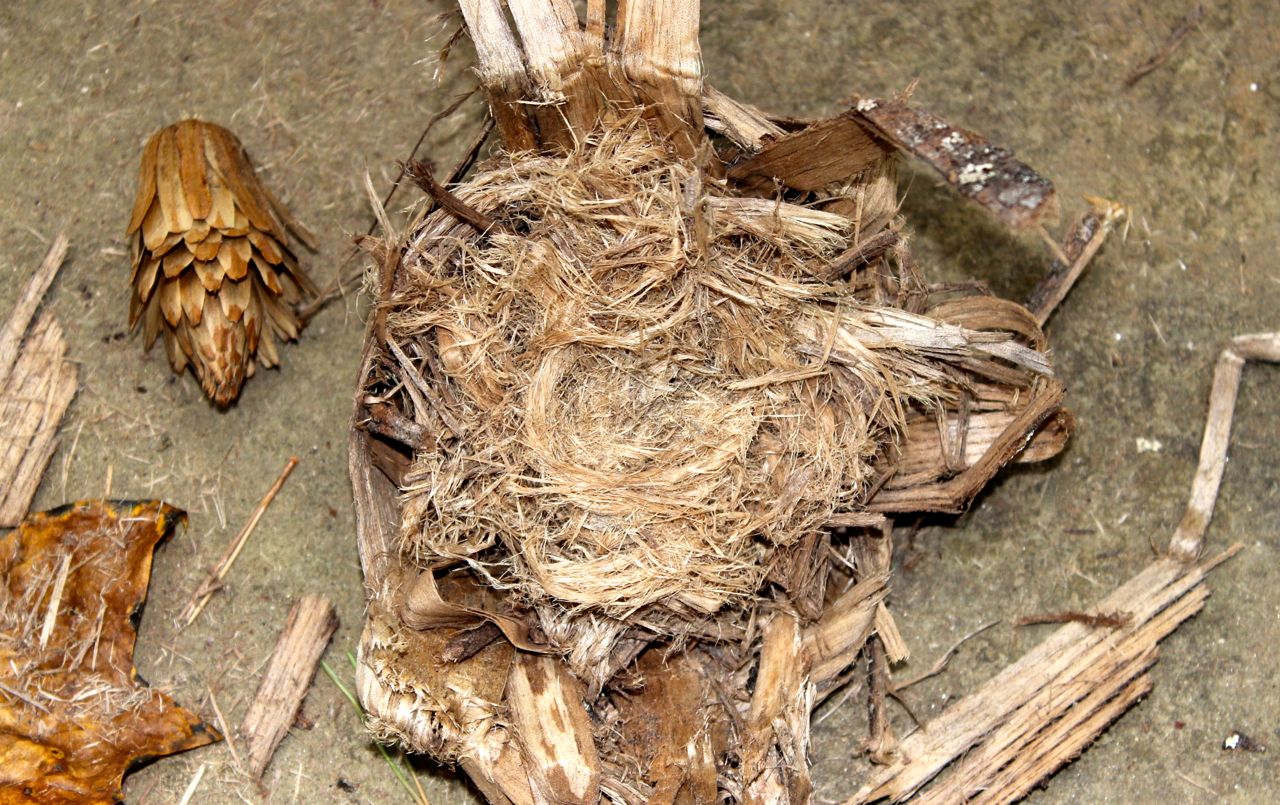
More tinder is added, but roughed even further to a MEDIUM texture. Remember size and heat capacity?
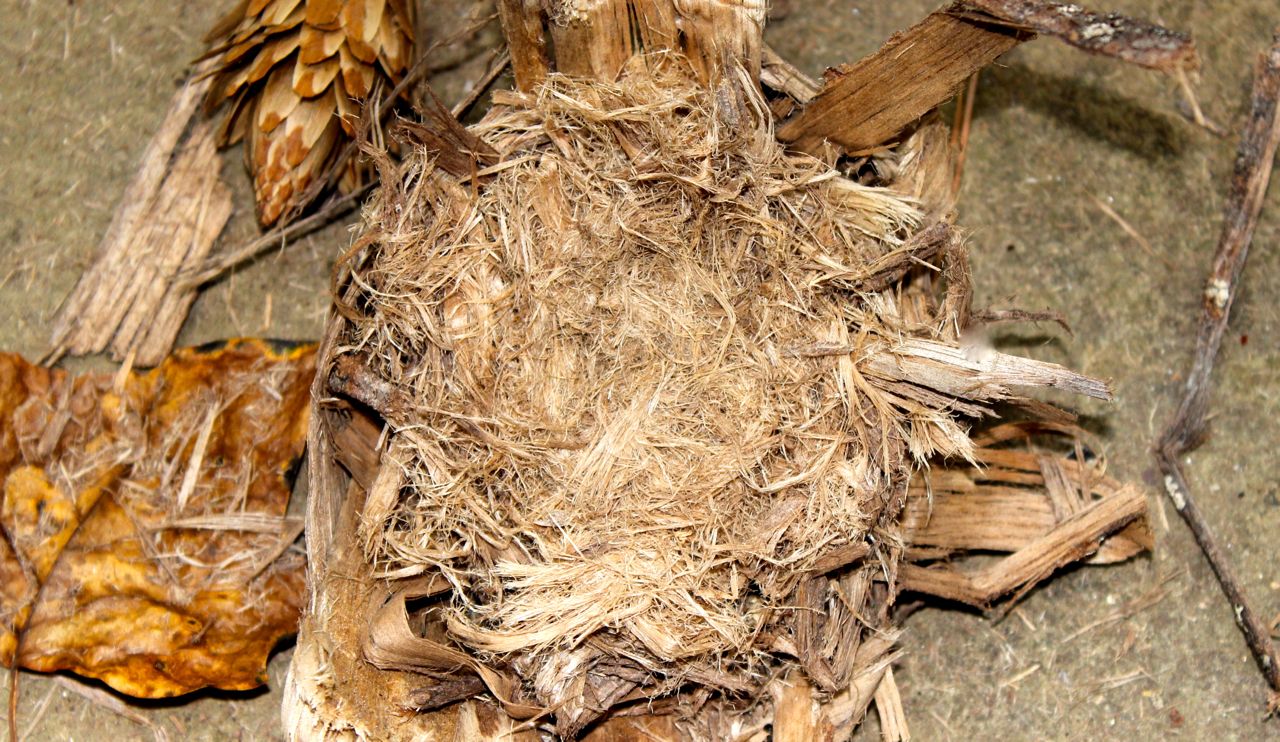
FINE tinder is made by grinding it in the palm of my hand and then pulling apart the inner bark fibers. Repeat until fibers are thread-like then add on top of the MEDIUM. The FINE tinder is our target area for our heat source. This tinder bundle is now ready to accept a friction fire coal or even the concentrated sunlight of a magnifying device. Attention to detail is critical with ignition sources that do not produce a radiant flame. If the material is not fine enough, it may have to much heat capacity for my heat source.
 Understanding the Weather
Three things primarily dictate fire behavior: weather, fuel and topography. Weather is of significant importance as it directly impacts establishment and continuation. Most folks equate moisture (or humidity) as the big weather variable as to one’s fire success. As you will read in the article YOUR CAMPFIRE AND THE WEATHER, you will learn just how much temperature drives the weather and can have an effect on fire making and behavior — quite appropriate for this article — one degree!
Practice Primitive
After mastering modern methods of making fire for safety’s sake, practicing primitive is a great way to get even better. All modern skills have their foundation in primitive skills and it is very empowering to know both. And as we mentioned earlier, that all important attention to detail is especially important when doing friction fire. Here are a few tips and tricks for friction fire beyond the obvious. For this part of the article, I am assuming you have at least attempted the bow drill.
All of these little nuisances listed below maybe be worth a degree or two and believe me, they add up and could be the difference between having just a pile of hot dust or a glowing coal…
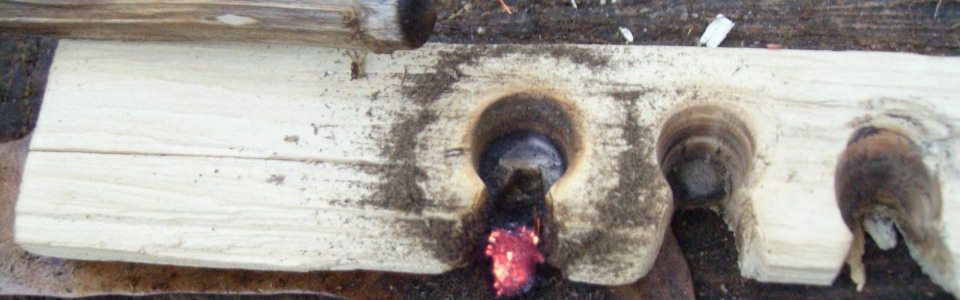
- Carve your set perfectly. Notches should look perfect from the top AND the bottom. You will be surprised how often they taper towards the bottom if you don’t do this, thus limiting oxygen to your potential coal.
- Take Alan Halcon’s advice and use a straighter bow for the bow drill.
- Take the time to carve the top of your bow drill spindle to a finer point to reduce friction if you failed in the previous attempt. Take any measures necessary to reduce friction.
- For the top of your bow drill spindle, use the oil from around your nose or your ear wax to reduce friction. Reducing friction on the top of your spindle means speed!
- Keep your set off the ground and away from moisture.
- If your set is damp, spend some time pre-heating with light pressure and speed. Don’t wear yourself out so you can’t “go for it” when you go to make a coal; but this pre-heating is in fact driving off moisture which would otherwise take energy (temperature) away from your set when you do “go for it.”
- Use the entire length of your hands for the hand drill or your entire bow for the bow drill. Being efficient in this manner could be that one degree.
- The straighter the better for your spindle. This is easy to recognize on the hand drill with a long spindle. That little wobble at the top can be a killer — think about a figure skater spinning with a little bit of leg or arm hanging out, then they bring it in and start spinning real fast – same thing.
- I won’t get into wood species here, you can find them under Resources, Flora of North America on this site. I will say that when harvesting from trees, the stem wood is generally easier than branches should you have a choice. Hey, that could be worth a couple degrees on a difficult wood.
- On harder woods, downward pressure should be lessened slightly in lieu of more speed. It is a bit of a balancing act.
- Softer woods are more susceptible to moisture, so you may want to look elsewhere after rain or think about getting deeper into the wood for your materials… and do the pre-heat method described earlier.
Good looking notch!

Photo: Brandon Jacobs
Because fire is so important, we have and will continue to devote a lot of attention to this sacred element at Master Woodsman. Along with cutting tools and cordage, fire is one of the foundational tools our ancestors created and used to build civilization. There is a reason Firecraft is the first skill in the Master Woodsman Training. There is a reason flames are in our logo.
All this being said, links below are to the current fire specific articles here at Master Woodsman. And we’re just getting started — I promise there will be many more.
- Your Campfire And The Weather
- That Fresnel Lens in Your Survival Kit
- Punkwood
- Join the Kneel Diamond Fan Club
- Firestarters: Fatwood
- Firewood Quality
- Fire-making apparatus – Report from 1888
- Swiss+Tech Utili-Key for EDC Firescraper
*** Temperatures are mentioned here as a guideline. Based on what source you read, there is variability on average of less than 1%. There is also variability within the fuels themselves. Here are few suggested sources should you be interested: ForestEncyclopedia.net, Forest Fires: A Reference Handbook, LBFD Fire Training Center
We highly recommend the fire related videos from Karamat Wilderness Ways.

http://youtu.be/neTqbKUsxqI
6 Responses to 1 degree; Wilderness Fire Starting Considerations