
When it comes to survival in the wilderness, a trash bag in your emergency kit could be a lifesaver for you and your family. This article is your guide to survival for it’s use as an environmental layer to your clothing and much more!
“Your clothing is the most important survival tool you have. Dress properly and any emergency you may have to endure becomes more manageable.” – Mors Kochanski
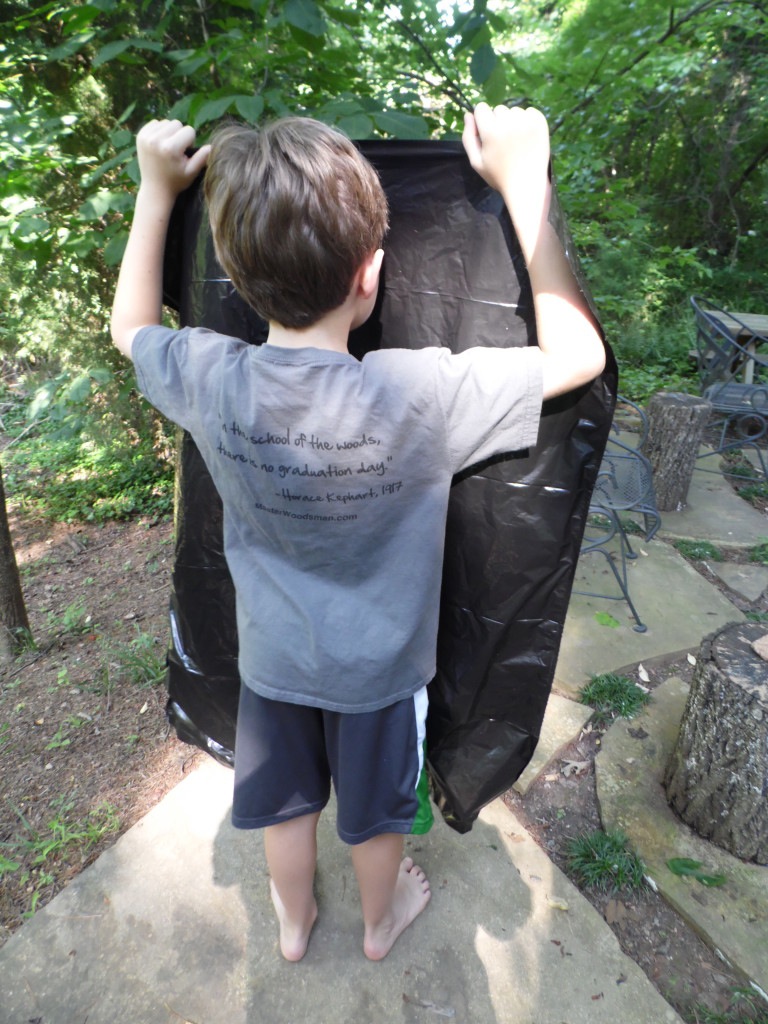
As a supplement to your clothing, carrying a garbage bag in your survival kit is recommended by numerous survival experts. In addition, The National Association for Search and Rescue’s (NASAR) Hug-A-Tree program instructs children (7 to 11 years old) to carry and use that plastic garbage bag as a poncho if needed when lost. Per their instructive video, see the pictures and description below for how-to-wear.
STEP ONE. Open up the trash bag after pulling from your pocket or survival kit.

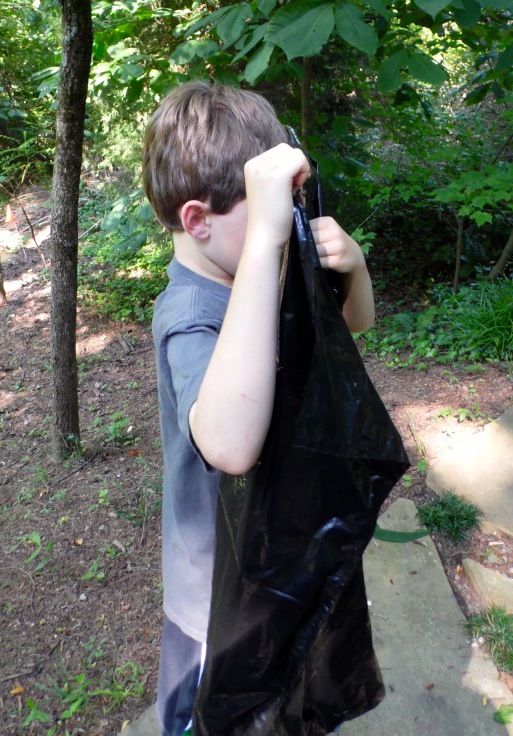
STEP TWO. Hold the bottom of the bag at the top of your head so that the bag is upside down.
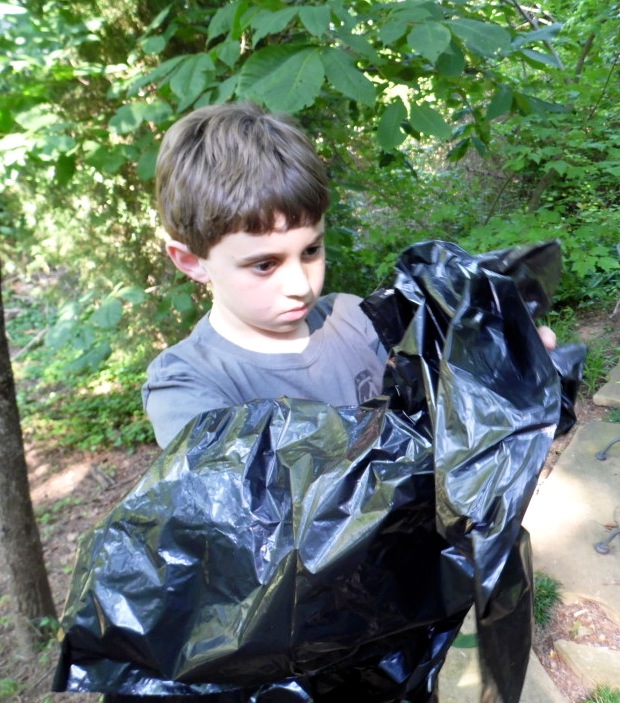
STEP THREE. Reach around and find your nose. Pinch this area of the bag and hold.
STEP FOUR. Now reach in with your other hand and poke a hole in the nose location and expand. Children should NEVER put a plastic bag over their head without making the face-hole first.
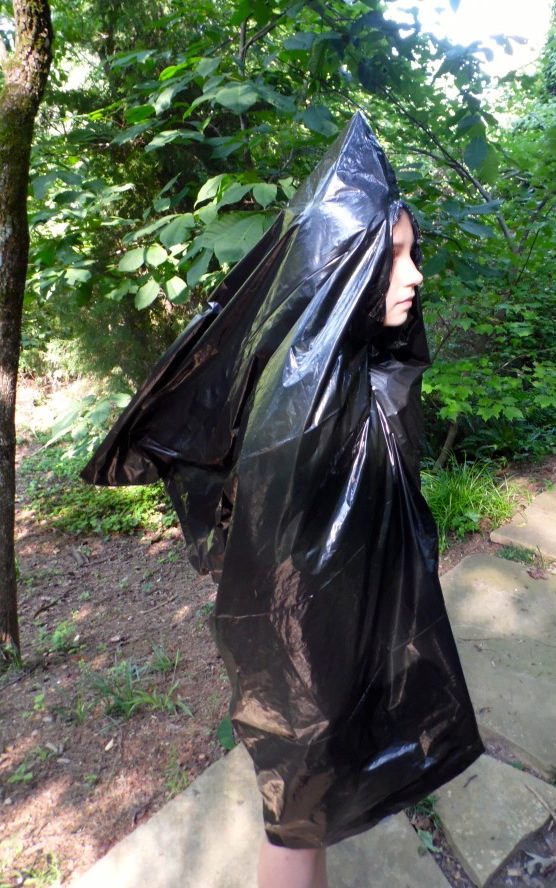
STEP FIVE. Put on your new poncho and adjust face hole.

So why such strong recommendations from NASAR and the experts?
The more popular “chocolate chip” configuration of a poncho to accommodate a backpack. Arm holes optional.
This amazing piece of plastic serves as a vapor barrier blocking out both wind and rain. That outer-shell weather barrier, also known as an “environmental layer” or “shell,” protects those all important mid and base layer(s) of insulative clothing underneath. However, being a vapor barrier, one must also monitor, and if necessary, vent this “garbage bag rain-jacket” to prevent moisture build-up which could in-turn compromise your insulation.
In addition to protecting what insulation you have when wearing as a poncho, if you have dry materials, you can stuff the ‘poncho’ with dry leaves, other clothes, crumpled newspaper, or anything else you can come up with to create dead air space to increase your insulation.
Because of it’s low cost, light weight, and small size when folded, I personally carry at least two 55 gallon drum liners. My kids carry the popular 39 gallon size. Why more than one? Because they are so versatile. While the poncho is my #1 use, look what else you can do with a trash bag…
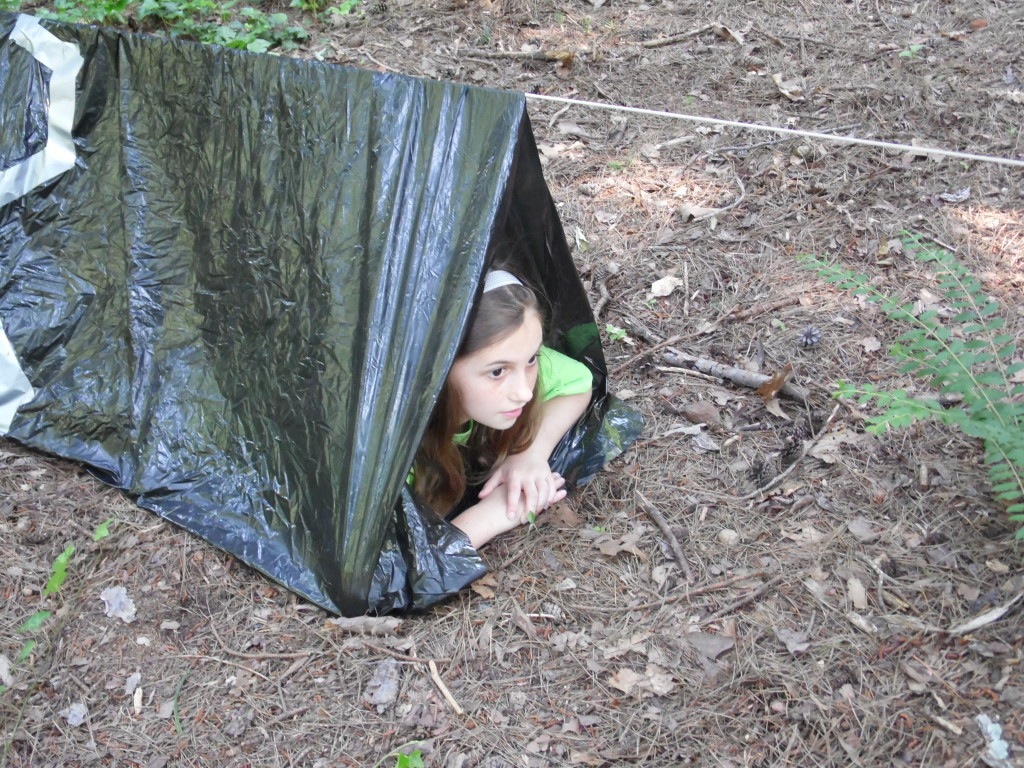
Shelter – can be pitched or draped as a survival shelter for shade or rain protection. Think about the sweat, calories, and time you’ll save versus trying to make something out of natural materials. With two drum liners, you can make another type of shelter…
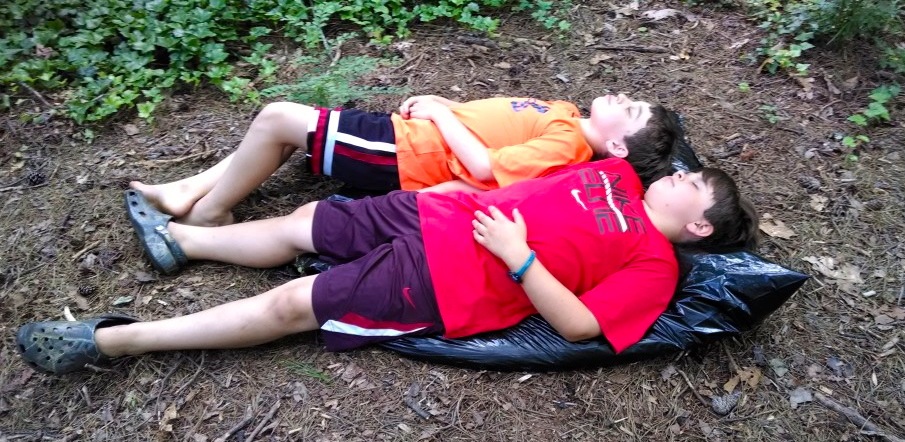
Tube tent from two 55 Gallon Drum Liners taped together.
Tube Tent – In addition to carrying drum liners, I also carry rope and duct tape. Duct tape has many uses including putting a tube tent together from two trash bags. Simply cut the end of one bag and insert slightly into the uncut bag. Run a cord between two trees and through the bag. A picture is worth a thousand words…
Signaling Device – while a little more difficult to find, some do come in orange. With movement, you have a large piece of material giving you the color and contrast for a visual signal.
Mattress – The smart woodsman dresses properly for the environment, just like he takes the appropriate weight (rated) sleeping bag… based on air temperature. While air temperature is one thing, sleeping on the ground is another, that’s why we also use a ground pad with our sleeping bag. The importance of addressing this in cold conditions cannot be overemphasized, as you lose three times the amount of heat to the ground than you do to the air (Wescott, 2009). Nature is always trying to balance temperature; as the second law of thermodynamics states — heat is attracted to cold. Simply put, your warm body lying in direct contact with the cold ground will not balance anytime soon — you are not going to heat up the earth.
 A trash bag can be a quick way to create a mattress and/or collect debris to build a mattress to be that “ground pad.” I have slept on 55 gallon drum liners on several occasions to reduce the conductivity of the ground by stuffing with leaves or pine needles. Just keeping your hips, torso, and head/shoulders insulated from the ground is usually enough (and a good thing too, as one-bag is not body-length).
Duvet – if fire is not possible, having that second or third drum liner can be a God send as a drum liner can be stuffed with vegetation to create a natural duvet. Just watch out for that trapped moisture when putting this insulated “blanket” on top of you.
Dry Storage – When raining while in warm weather, you can use the bag as dry storage. I simply take off my shirt and any gear I want to keep dry, put it in the trash bag, and wait for that summer shower to pass. I will do the same when walking through thick vegetation covered in dew. Once the moisture is passed, I still have something dry to wear.
Water Collector – like a small tarp impervious to water, a piece of plastic can be spread out to capture rain or even dew. Find or make a depression in open space keeping the center of the plastic the lowest point. Weigh down the corners with rocks or sticks.
Water Carrier – watch for punctures obviously. If you have a bandana, shemagh or other cloth, see how to make a carrier for your “plastic-bag-canteen” here.
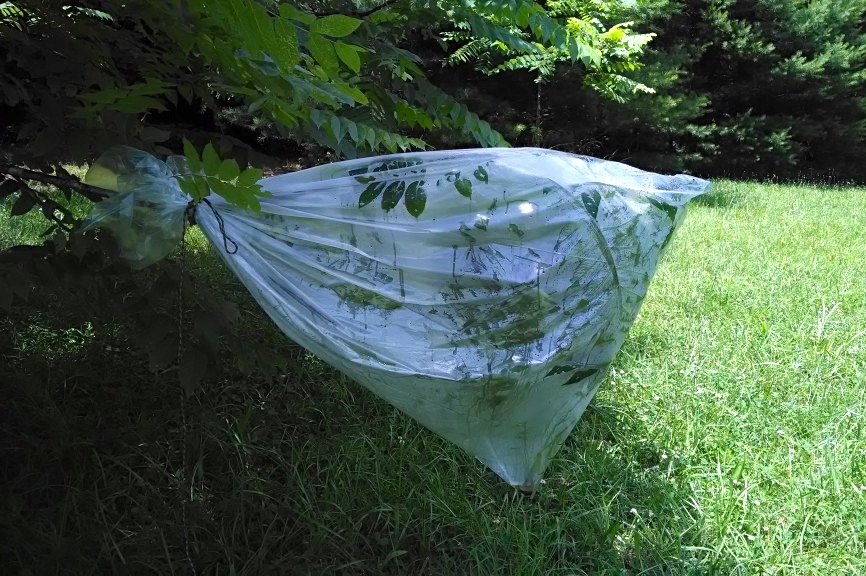
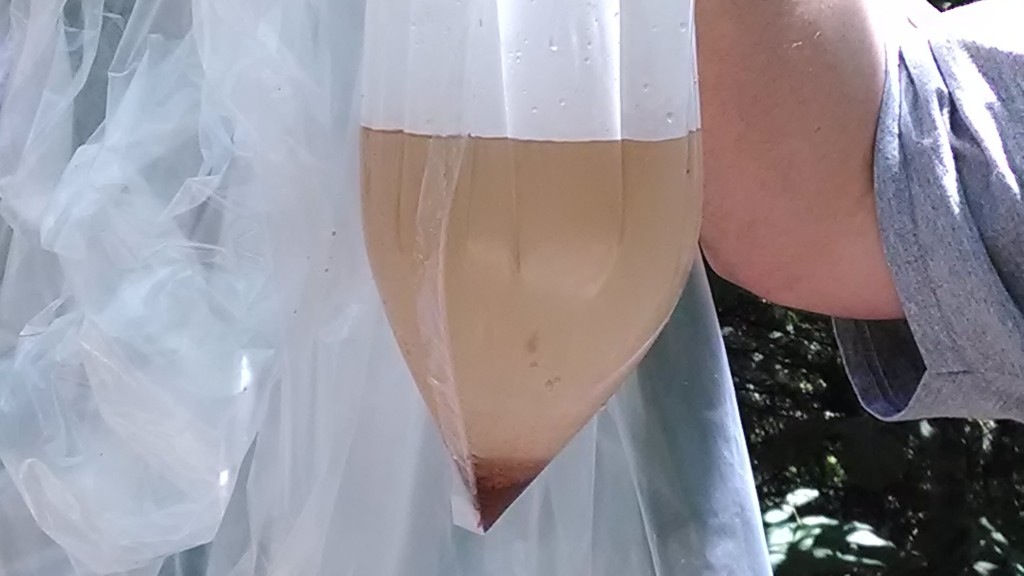
Clear 55 Gallon Drum Liner used as a transpiration bag. Needs to be in full sun as this bag was when placed on the branch.
Transpiration Bag – Transpiration is essentially water evaporation from plants through their leaves. According to the USGS, studies have revealed approximately 10% of the moisture in the air is from plant transpiration. The other 90% from bodies of water. When water is not at the surface or if it is, and not safe to drink, you can make a transpiration bag with your clear plastic drum liner to collect this transpiring water vapor.
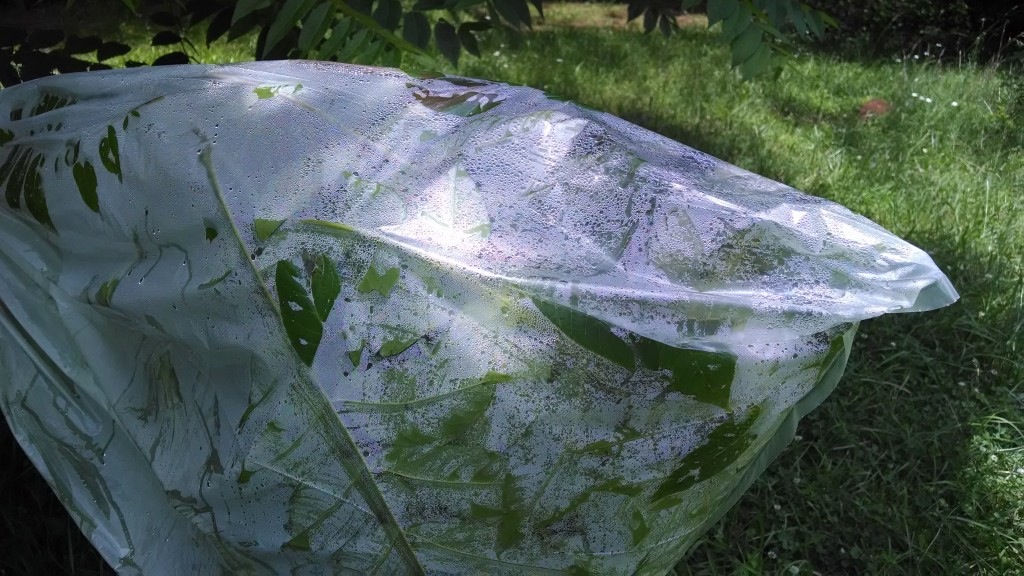
Condensation should be shaken to fall in the bottom of the bag before removing.
Look for the branch of a tree (or bush) that is or will be in direct sun. The healthier and less-leathery the foliage the better. Give it a shake to get any bugs and frass off. Enclose the bag around the foliage tying it off down the branch making sure a bottom corner is the lowest point. It may help by weighing that low corner with a smooth rock.

Approximately 6 ounces collected from two hours of full sun. It was an 80 degree day with 60% humidity in the North Georgia Mountains on the Summer Solstice.
The yield from a transpiration bag will vary greatly; the good news is it takes little calories or sweat to construct (unlike the solar still which is NOT worth the effort). Another way to construct a transpiration bag is laying it down on the ground placing green foliage inside. Add a stick with rounded ends or padded in someway in the bag like a tent pole, then tie if off. Technically, it is evaporated water that has condensed in your bag, so a plant’s toxicity should not be a factor. Nonetheless, avoid the toxic plants as they will be in contact with your bag and water.
Wound Irrigation – treated water in a clean plastic bag with a small hole poked in it can be used to irrigate a wound in a pinch.

Reverse-wrapped cordage made from one 55 gallon drum liner. Even at this thickness, it stretched dramatically with use. Above is the abrasion result from 3 separate passes with known ‘easy’ bow drill set. Was unsuccessful in making a coal. Click to enlarge.
Cordage – while you can make cordage from a trash bag, expect a lot of elasticity and susceptibility to abrasion. Should work well for most light tasks.
Glue – It can be used as a glue by putting heat to it, but it burns and shrinks very rapidly. Add even a slight wind which I tested in, makes it very difficult to direct. And it dries as fast as it burns also making it hard to work. Not to mention the fumes are likely toxic. I am sticking with the time tested pine pitch mixed with crushed charcoal if I need glue. There are some good articles on the web about pitch glue, we will try add one here to the website.

55 Gallon Drum Liner with 36 ounces of water ready to be rock boiled. Sides are supported by rocks and wood. There is a flat rock in the bottom to act as a trivet.
Boiling Water – putting a plastic bag over a heat source and getting water to a boil can be done… and is usually demonstrated “on TV” or in the classroom. If you are in a true survival situation and relying on that bag to reduce heat loss (poncho, mattress, etc.), don’t take the chance of compromising your bag by putting it over a fire. Should it fall or your heat source touch a large area where there is no water, it could be completely ruined for other functions.
Doing a rock boil is not too difficult once you practice; and generally, if a bag is compromised it is usually a very small hole. So how do you do it?
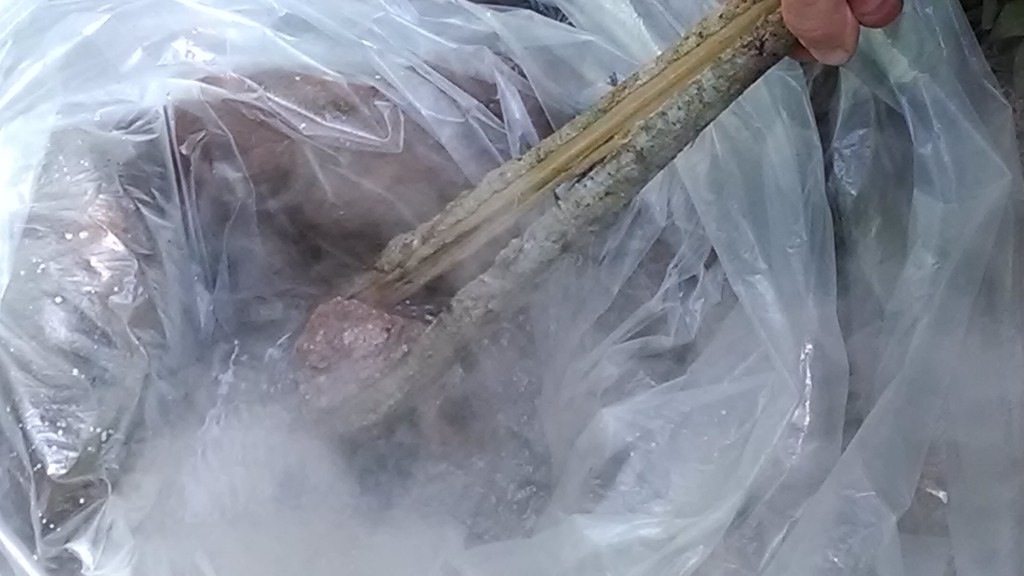
Keep rotating rocks to the water even hotter. I never let go of the rock, I just rest it on the trivet. You will know when to switch to the next rock, it’s not long.
- Collect rocks away from a water source. Those from a water source may have trapped moisture inside and explode when heated.
- Heat rocks in fire. How many and what size will depend on how much you are boiling. For a quart, I use five a little bit smaller than fist size each. Your rocks and how you heat them may vary.
- Construct something to support your trash bag; this could be digging a depression and/or stacking wood/rocks/dirt to support it as a rigid container. You will learn quickly to keep a tight diameter or your bag/water will spread out and you won’t have enough water depth in which to place the hot rocks. Test your tongs with a cool rock after construction.
- Line the bottom of your make-shift container with cool rocks or other non-toxic materials to act as a trivet. Or you can hold the rock suspended in the water. Water is a great conductor of heat and will protect the plastic from boiling water. If you touch a hot rock directly to the plastic, it will likely melt a small hole.
- Using fashioned tongs, move heated rocks in and out of the water one at a time until boiling. It will be a little like playing the old game Operation, try not to touch the sides!
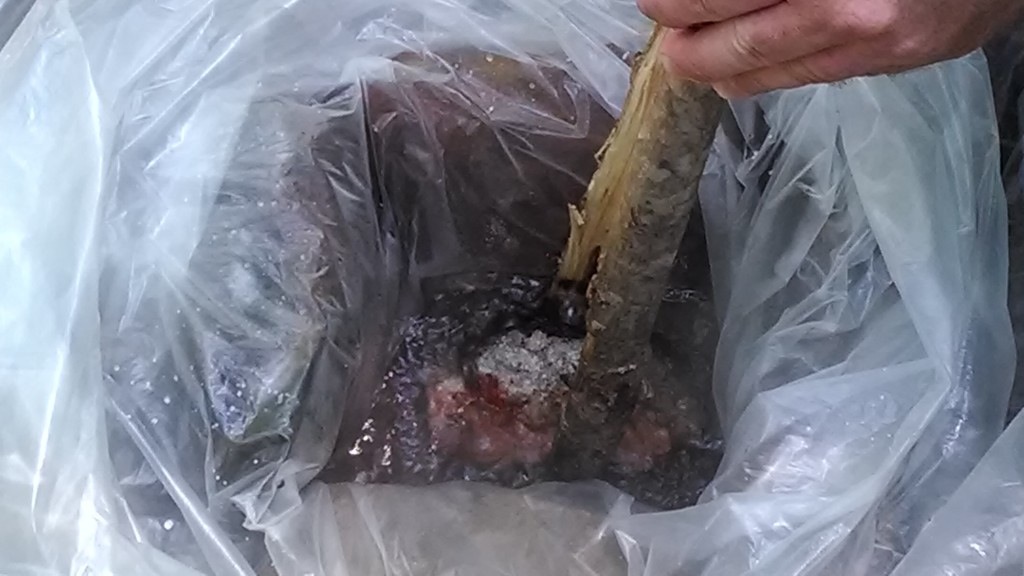
Obvious success!
 36 ounces of rock boiled water in an undamaged 55 Gallon Drum Liner. Sediment from the rock will settle. As this is something we don’t normally do everyday, you will have to remind yourself that the bag is extremely HOT!
Fire – there are quite a few articles and videos out there using a plastic bag to start a fire as you would with a magnifying device. The ones you do find are using very thin, clear plastic bags. I won’t say it can’t be done with a 1.1 mil drum liner (which I carry). I am just saying I hope you have several other ways to start a fire as I couldn’t get any natural tinders to an ember.
Flotation Device – a trash bag or two could be filled with air, tied, and subsequently used as an emergency flotation device in water.
Other Very Important Considerations:
- This person that wrote this article has a day job. Always consider the source when it comes to YOUR survival. My bio is below.
- I know it does a lot… but it is being suggested here that a trash bag is a part of your survival kit. Not your survival kit.
- Understand the 5 Heat Loss Mechanisms; Conduction, Convection, Radiation, Respiration, and Evaporation. The good survival books and videos will address these if you are not already familiar. Having an understanding of these will help you with your trash bag creativity. Surely there are more uses than what is listed in this article.
- Store your garbage bag in a sealable plastic bag such as a zip-loc to maintain its integrity. Dirt, sand… grit in general will act as an abrasive potentially compromising your trash bag. And that plastic baggie can be used for other things such as irrigation of a wound, water carrier, collecting water from a shallow puddle or Indian well, and maybe even fire.
- Rotate. Time will make plastics brittle. Not to mention, things we don’t use regularly go to the bottom of our pack where shifting contents can wear them out.
- This is a personal preference. I like the 1.1 mil 55-Gallon drum liners as they offer good durability for their small carrying size and weight. I usually carry one clear and one black, both can be found at Home Depot. Contractor bags of 4 mil are too heavy and thick in my opinion. And they don’t come in clear.
Wescott, David. Camping in the Old Style. Salt Lake City; Gibbs-Smith Publisher, 2009. Book
21 Responses to Your Guide To Survival Using A Trash Bag